Your new
iPad 2 might not be as full-featured (or as complicated) as a laptop or desktop PC, but a few neat tricks are still hidden between the surface. Read on to learn how to secure your iPad, sync your bookmarks, and more.
Download the free iPad User's Guide: You may have noticed that your iPad didn't come with a big printed manual--that's not Apple's style. However, you can download the PDF version of the iPad User's Guide from
Apple's Web site, or you can read it in iBooks if you have that installed (iBooks is available as a free download in the App Store). Make sure to download the manual for iOS 4.3.
Take a free guided tour: Apple provides
video tours for each of the preinstalled apps, so you can get a good look at how to use them.
Use the Side Switch: You can use that neat switch on the side either to enable and disable audio alerts (this doesn't affect video/audio playback) or to lock the screen's orientation in portrait or landscape mode. You can toggle which function is assigned to the side switch by opening
Settings from the Home screen, selecting
General, and choosing the function you want under the 'Use Side Switch to' heading.
Multitask in iOS: You probably already know that you can press the
Home button twice to bring up a list of
currently running or suspended apps. However, you can also swipe the multitasking bar left to right to quickly access audio/video playback controls, a shortcut to the iTunes app itself, and volume controls. Also, when you choose whether the Side Switch should mute alert sounds or lock the screen orientation (see the item above), the function you
didn't choose will appear in this shortcut bar.
Speed up your sentences: Double-tapping the spacebar while typing a message will type a period and then a space.
Don't let AutoCorrect mess you up: If you don't like the option AutoCorrect gives you, reject it by finishing the word as you prefer, and then tapping the suggestion. If you want to use AutoCorrect's choice, just type a space or punctuation mark, or tap
Return, the moment it pops up.
Secure your backups: You can encrypt your iPad's backup data in iTunes. Just open the iPad in iTunes, click the
Summary tab, and check
Encrypt iPad backup under the Options heading.
Prevent automatic sync once: Sometimes you don't want to sync your iPad when you connect it to your computer. In this case, hold down
Shift-Control (or
Command-Option, on a Mac) in iTunes while plugging your iPad in, and iTunes will skip the automatic sync just once. Alternatively, you can safely interrupt a sync by dragging the unlock slider while the iPad is midsync.
Toggle data roaming: If you're using a 3G iPad, you can turn data roaming on in the
Settings, Cellular Data menu in case you want to try receiving cellular Internet through a different provider (fees may apply). You can also check your data usage by going to
Settings,
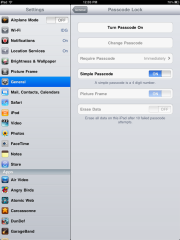
General, Usage.Make your passcode more complicated: iOS defaults to a four-number passcode, but you can turn it off by going to
Settings, General, Passcode Lock,
Simple Passcode. Now you can use any full keyboard password to lock the iPad. The password also helps to encrypt your mail and attachments on the iPad, so you probably want to make it safer than a four-digit number.
Set the iPad to self-destruct in 10 seconds: Okay, not really--but you
can set the iPad to erase all data after ten failed passcode entry attempts by checking the
Erase Data option under
Settings, General, Passcode Lock.
Tweak AutoFill: You can choose to enable Safari's AutoFill feature in
Settings, Safari, AutoFill. From there, you can tell Safari to fill forms automatically either by using your specified contact information or by remembering the names and passwords you've entered while logging in to Websites in the past.
Sync your bookmarks: You can use iTunes to sync your iPad's Safari bookmarks with your PC's Web browser. Open the
iPad tab in iTunes, click the
Info tab, scroll down to the Other heading, check
Sync bookmarks with, and choose your preferred browser.
E-mail photos: The easiest way to e-mail photos from an iPad is to open the Photos app, select a photo, press the button in the upper-right corner (the rectangle with the arrow, not the trash button), and choose
Email photo... to send.
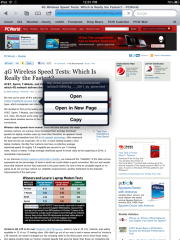
Know your Web links: You can check a linked word's actual destination URL by touching and holding down on the link--it's a perfect way to sniff out phishy links.
Choose an app for e-mail attachments: You can open a file attached to an e-mail message by tapping the attachment in Mail, but if the default app isn't the one you want to use, you can press and hold and wait for a menu that lets you select an app.
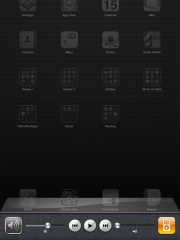
Use the iPad as a picture frame: Not for physical photographs, silly. You can press the Picture icon in the lower-right corner of the Lock screen to have the iPad display its available photos.
Show traffic conditions: Open Maps, press the dog-eared page icon in the lower right, and then turn the
Traffic overlay on. If your iPad has an Internet connection, Maps will show real-time traffic conditions in the displayed area. Green means traffic is going at the posted speed limit, yellow means traffic is slower than the posted speed limit, and red means traffic is stop-and-go.
Share podcasts with friends: Listening to a podcast that you think a friend would like? You can share the link while you're listening to it by pressing the
Email button while it's open.
Don't forget your downloads: You can immediately see if your iTunes account is due for any incoming downloads by opening iTunes on your PC, clicking the
Store menu, and selecting
Check for available downloads. This trick can come in handy if your download process is interrupted, or if you missed some bonus iTunes content that came with an album you purchased.
Turn on Universal Access: You can enable options such as closed-captioned movies, VoiceOver screen reading, zoom magnification, and inverted white-on-black text by selecting the iPad in iTunes, opening the
Summary tab, and clicking
Configure Universal Access under the Options heading.
Forget Wi-Fi networks: So you accidentally connected to a network once, and your iPad remembers it for life--whether you like it or not. On your iPad, go to
Settings, Wi-Fi, and find the network under the 'Choose a Network' heading. Tap the blue arrow next to the network you want to remove, and tap the button on the top that says
Forget this Network.
Specify your Spotlight searches: The iPad uses Spotlight for its built-in search functions, and you can tweak it to your needs in
Settings, General, Spotlight Search. If you have a lot of data on your iPad, for example, you can selectively disable search in different categories (Contacts, Applications, Audiobooks, Notes, Events, Mail, and so on) that you don't use so that your desired results show up faster. You can also simply change the order in which the search-result categories display by dragging them up and down, so that your more frequently used search categories show up at the top of the page.
Turn off in-app purchases: Go to
Settings, General, Restrictions and tap
Enable Restrictions to selectively enable restrictions that apply to your apps, content, Game Center, and more. If you're worried about other people breaking your bank account on
in-app purchases, just disable
In-App Purchases under the 'Allowed Content' setting.
Switch up the fetching frequency: Your iPad automatically grabs new data, such as incoming e-mail. However, the iPad periodically activates apps that don't support iOS's Push feature so that they can go "Fetch" new data--which uses the tablet's battery life. You can tweak your Push and Fetch settings in
Settings, Mail, Contacts, Calendars, Fetch New Data.
Change your e-mail signature: Don't be one of those people who leave the default 'Sent from my iPad' signature on all their messages. Change it in
Settings, Mail, Contacts, Calendars, Signature to...well, anything but that.
Swap the search engine: Too good for Google? You can change Safari's default search engine by going to
Settings, Safari, Search Engine. Alas, you can only choose from Google, Bing, or Yahoo--no bringing back AltaVista for you.
Take a screenshot of whatever is on the screen: Press
Home and the sleep/wake button simultaneously. The screenshot will automatically appear among your photos.